Thursday, May 19, 2011

Tea Anyone?

What a great gift for any tea lover! 
 Yet another GREAT project from PCL (Paper Crafters Library).  This looks very complex but once you do one, you can whip up a few more in no time.  Its that easy!...  Once I assembled the tea bag holder, (See how its done here)  it was time to decorate.  Using my SU 'Time for Tea' set, I cut out the tea pot and gave it a little dazzle with my stickles. 

 I then used my stickles to go around the teabag holder to form a line of dazzle.  To top it off, I created these rose flowers (made of paper).  THESE are sooo easy to do...


I used a circle punch, cut through it, and then started to roll them.  Spritz them with the shimmer and there you have it!  I hope you've enjoyed my project. 

Wednesday, May 18, 2011

Vintage Tin for Mother's Day

WoW…how time flies. Mothers Day has come and gone and we are almost near the middle of the year (June). For my mothers day project I chose a vintage tin.  I had a great deal of fun and excitement when I was making this.  I got the jump start from PCL(Paper Crafters Library ). I used what I had in my craft room but just took the basics to get started. PCL is a great website to get ideas flowing. If you’re ever interested in joining in on creative fun …just click on the Paper Craft Library button above at the top of my blog. It’s loaded with videos and PDF files. There is no obligation to be committed for any period of time, you can cancel at anytime. Now on to the project. I used a Stampin’ Up tin (I believe they still might be on clearance for 2.99). Covered the tin with paper from K&Company. (Life’s journey). (refer to PCL to see how this is done) LOVE THIS PAPER! Really cheap at Michaels. And when you use your coupon…even cheaper! The flower is made by using Tim Holtz tattered florals die cut. Using 2 large, 1 medium, and 1 small flower I lightly mist them with water using my spray mister…crinkled them a little then reformed them. I then sponged them individually with SU Cajan Craze ink and assembled them together with a brad. Believe it or not - I didn’t think ‘orange color’ would go but it went perfect for the accent color that was in the paper. It turned out to be more of a blushy color than a fall looking color. (This is what happens when you get out of your comfort zone and just experiment). The ribbon with pearls are just misc. pieces I had kicking around my room that I bought from HL and the sentiment is from SU set called Well Scripted. The hardware is also from SU. And just to touch it off, I sprayed it with frost shimmer mist to give it just a hint of softness.
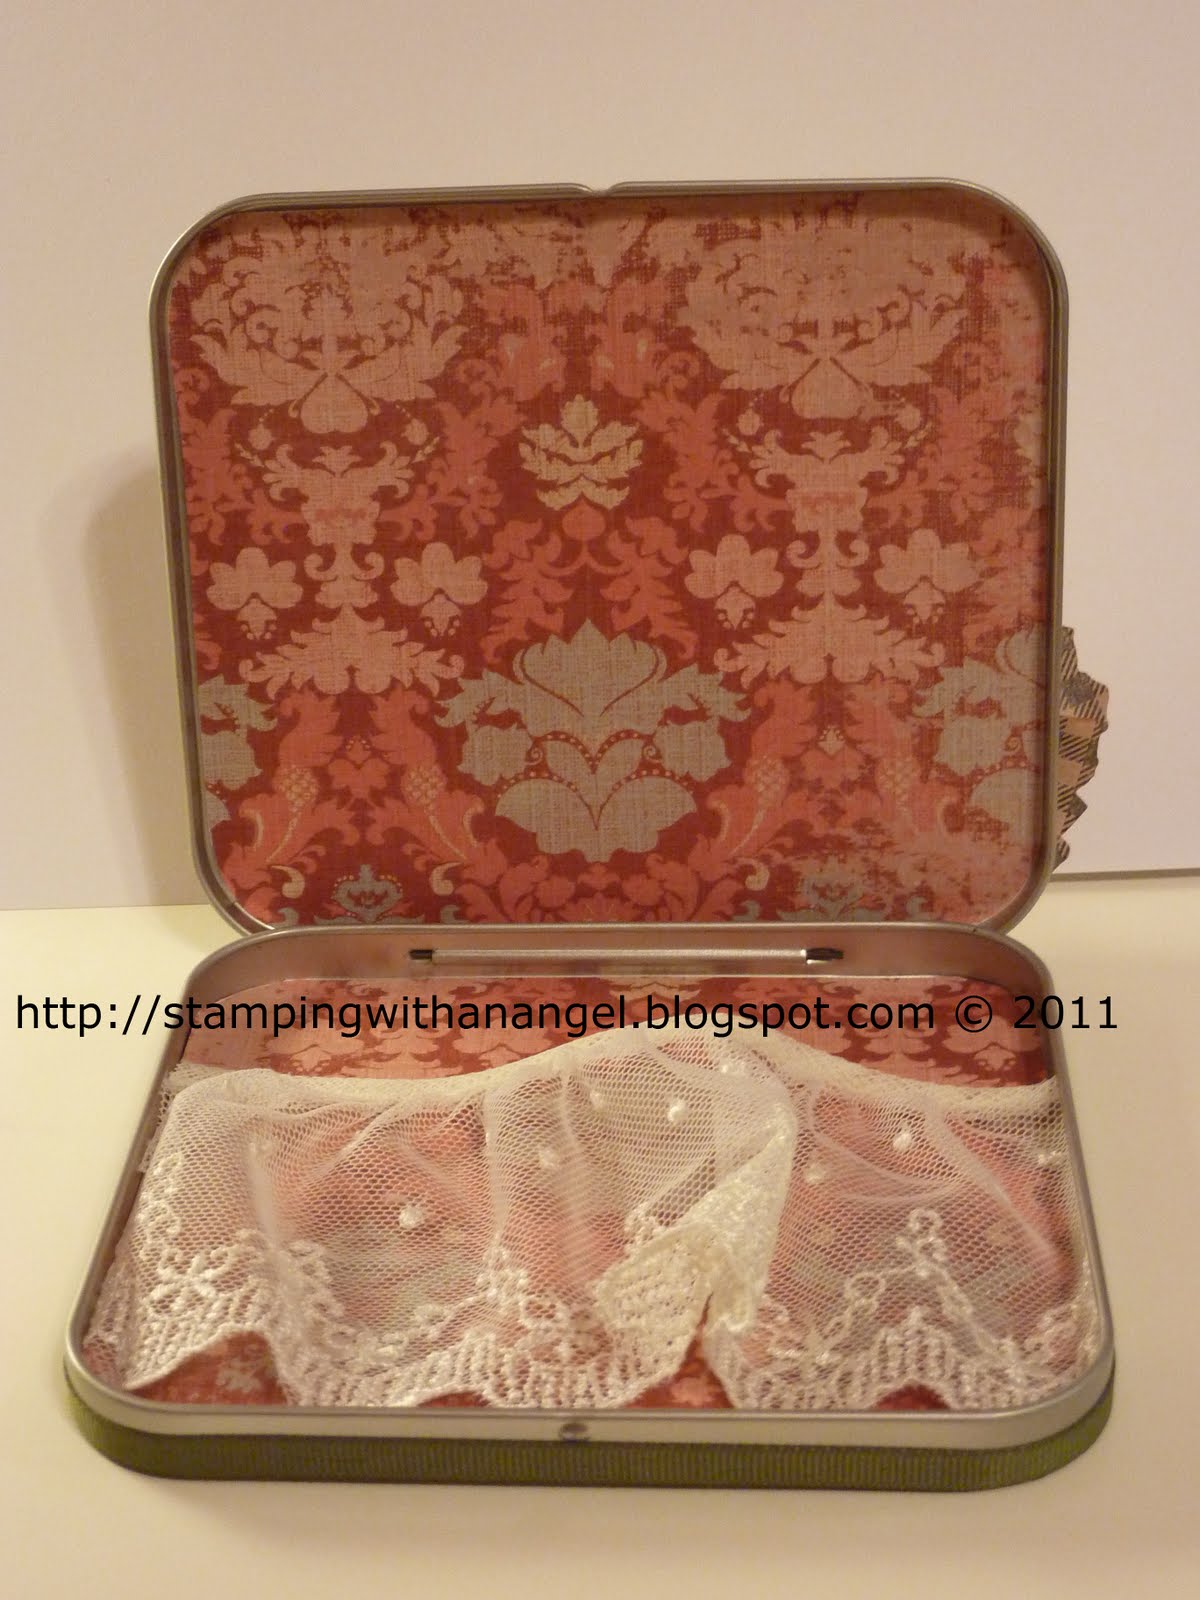
Now on to the inside…I used the back side of the paper
and lined the inside of the tin. I thought how nice it would be if she would use it to lay her earrings inside. So, rummaging through some stuff I had laying around, I added a little piece of lacy ribbon inside….so when she lays the earrings down, it would be easier for her to see where she placed them. And it adds a little vintage look to it.
I made her a vintage card to go with her gift.

Using Nestabilities Label 4 I stamped my image (wire dress form from Stampabilities), I then sponged it using Cajan Craze ink. My card base is Old Olive and I incorporated the same paper for the background using the same pearl ribbon to tie it altogether. I topped it off using some pearls on the image just to enhance the vintage look. I again used my Frost Shimmer Mist to top it off.
I hope you’ve enjoyed my project as much as I did. I enjoyed it so much; I’m looking to do some swapping with other vintage lovers out there. So, if you’re interested, contact me and we can set up some kind of swap group for vintage tins.

Thursday, April 28, 2011

I GOT IT !! ...figured out ~ that is.....

Whew!!!  I finally fixed my title post....what a nightmare....If you remember...I was messing around with my fonts and colors....well, thats a ~NO~NO! 

Sometime ago I came across some directions from Kevin and Amanda's website on how to play around with your fonts on your blog with your titles and sidebars. 
Well, their great directions....when you FOLLOW THE DIRECTIONS......(lol)...!!!!   It took me alot of hours to figure out how to fix the big, bold, hot pink, size 50 title that I had.  YIKES!  I only wanted to see if it really worked and so I picked big bold colorful font....and then...I tried to reverse the directions...well it doesn't quite work that way...
What I didn't realize until tonight...is how it actually all tied in together....I was just doing what the directions said to do...not really understanding the WHY behind it... so, after many many failed attempts to fix it ( I read those directions a thousand times!)... The light came on!  Now I get it!!!! 
WoW! - its taken me how long???..yeah, Im blonde.

Sunset Fisherman

Yet another birthday...I know!  My FIL will be turning 70 on Sunday and what better card than this.  He loves to fish. I used an old stamp set from Stampin' Up called "Summer by the Sea".  For those of you who are familiar with the set, you will know that is is not a silouette stamp set - BUT as I was browsing splitcoast stampers for masculine fishing cards...I came across this  particular card .  I had to try this!  This is an actual photo with an amazing sunset from Oneida Lake.  Oneida Lake sunsets are the best ~ Absolutely BREATH TAKING in the summer.  I stamped my image with Black StazOn ink and then used a sharpie marker to fill it in. 
I then used a thin sharpie and a straight edge for my fishing line and then stamped a fish from the set "on the fly".
I would have loved to have a stamp that said 'Papa' because that what my kids call him but I had to used what I had...The sentiment is from Stampin' Up set "let the fun begin"
I hope you enjoyed this post as much as I did.  Go ahead and give this technique a try....I guarantee you'll be printing more pictures!
ENJOY!!

Friday, March 25, 2011

HAPPY BIRTHDAY

Before I begin my post...I have to apologize..... First because I can't figure out how to change BACK to my original font for the titles - Its hot pink and BIG. I put a request into Amanda @ kevinandamanda.com to desperately help me...but I haven't heard back from her, so perhaps I can put another request in. And, secondly, because I have not been posting for awhile. So, enough of that....

Today, I’m sharing a few projects I whipped up. I love making 3-D projects...they are fun and challenging. Taking crafting to a whole new level...you feel a joy of accomplishment when all is said and done.

This cupcake came from a template that I obtained from Paper Crafter's Library.  Take a visit to their website.  What do ya think?  There's whole latta craft there.  I used my red stickles to get a shiny cherry on top.  Then for the sprinkles I used my blue, yellow, green & pink stickles. 
 CAKE BOX
My next project was made from another template (which I'll share with you at the end of this post). Tomorrow is my Aunt's birthday.  My daughter & I whipped this up in one night.  Not bad for a last minute idea.  After all - 4 hands are better than 2.  
 
 I found the template from doing a search on 'free cake box templates'....There are many to choose from. Once I saved it to my computer, I had to adjust the size to my liking.
I had this glass plate laying around in my craft room for a different project that I never got around to doing ~ yet ~

[there's still time...lol] so I decided to put it to use.  After putting the cake on it...I decided to dress it up using Stampin' Up punch called 2-step Bird.  Did ya happen to notice the flame on the candle...yup...its the bird.  This punch is SO UNIVERSAL....
Well, hope you've enjoyed....As promised...here is the template for the cake...
Recipe:
12 sheets of Cardstock (any color)
Ribbon (to wrap around the boxes)
Ribbon for the bow
Embellishments (punches, Quikuts, plate etc..)

Cake Template
Go take a look: Paper Crafter's Library
Related Posts with Thumbnails

PAPER CRAFT LIBRARY (PLC)